Christmas Fairy

by Craftybernie at 05:20 0 comments Labels: christmas, crochet, decoration, embroidery, fairy, Felt, Felting, flower fairies, Needle Felted, wreath
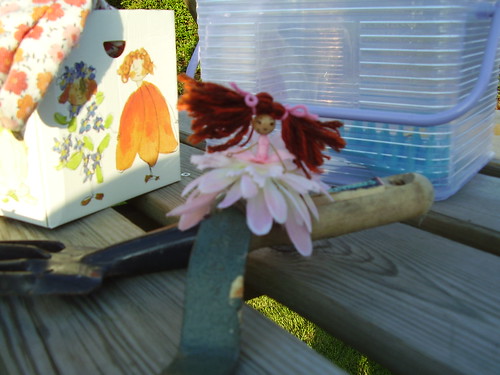
 Here's my latest fairy. Isn't she a cutie? She was sent to a pal in the US as part of my first Craftster swap.
I came across some delicious silk flower petals in a craft magazine last week and instantly fell in love with them. It seems that flowers are big in crafting at the moment so lucky, Lucky, LUCKY me!
These flower petals would be ideal for making flower fairies. It's cheaper than buying the refils from 'Klutz' plus you get to choose your favourite flower and/or colours. Most of these packs also have coordinating ribbons and fibres available in the same range - nothing like a well turned out fairy to make you smile.
For a reasonable price you get a substantial amount of flowers in each packet/tin/jar. There are many different brands available, but hydrangeas and daisies appear to be the most readily available. They come in a variety of sizes from small (1.5cm approx) to jumbo (5" approx) and a wonderful array of colours.
This is the first time I've seen fabric flower petals so readily available. Until now I've been buying recycling silk flowers that I've purchased from charity shops or that I find at fairs and fetes. I then spend an evening taking them apart and usually surrounded in second hand dust. Yeuck!!! Not entirely the most enjoyable experience you can imagine!
The thought of working with these gorgeous flowers really appeals to me! If you want to check them out online, Google the following phrases:
Bazzill bitty bloomers
Auntie Sarah's Bloomers
Prima Flowers
Making Memories Blossoms
Paper Mania Silk Flowers
One final thing, if you find you end up with too many of one colour, simply swap with a pal.
Happy creating.
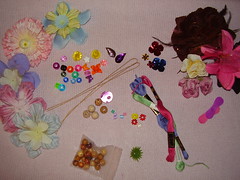 Here is a selection of items that you will need to make flower fairies: Silk flowers, paper covered wire, wooden beads, sequins, beads, embroidery thread or floss. You will also need a permanent marker, round nose pliers and some strong pva glue.
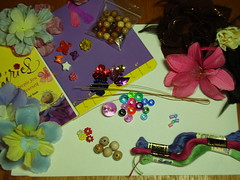 Paper-covered wire can be bought from cook shops & florists. The paper has a tendency to unravel so you need to dip the ends into pva glue when you cut them. Cut the wire into two lengths – one piece into a 6½” length and one piece into 2½” length.
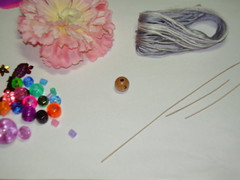 I have used size 13mm wooden beads, which I varnished with some craft varnish/glaze. I used a permanent marker to draw on the fairy faces. You could also use a colouring pencil to draw the faces on unvarnished beads.
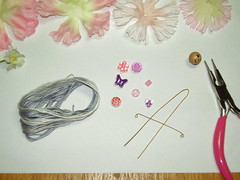 Using your round nose pliers, or a cable needle, curl under a small piece of each end of the short wire to make the hands. Take some embroidery thread and wind it around your fingers about 10 times to create the hair.
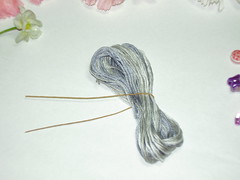 I have mixed grey, blue and light blue threads together to add texture. You can also use boucle, mohair and other fancy yarns instead of embroidery thread/floss. Bend the longer length of wire in half and catch the hair in the bend.
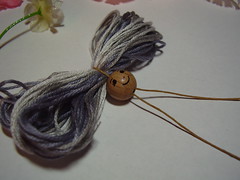 Feed the wire through the hole in the wooden bead and push the bead right up to the hair.
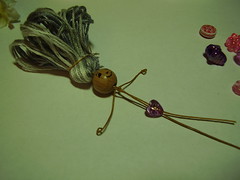 Pull the hair out of the way with a piece of scrap thread or wire. Attach the arms to the body by placing it horizontally below the head. Fold or twist the arms into place. Feed on a decorative bead for the body.
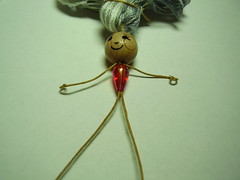 You can try out different beads: heart or teardrop shaped beads make pretty bodies. You can also add beads to the arms to make ‘puffy’ sleeves to match the bodice of the dress. Use your imagination.
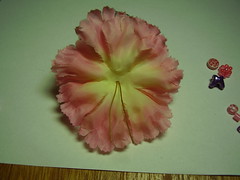 Add the silk flower petals, starting with the smallest: feed both legs through the hole in the flowers until you have added enough to make a pretty skirt. The more petals you add the fuller the skirt. I have used carnation petals here.
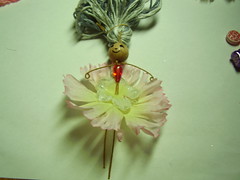 As you add each petal, you can also add a dab of glue between the layers to help keep them in place. This is a view of the underskirt with the legs peeping through.
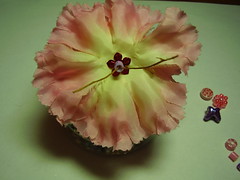 This is optional but it adds a nice finishing touch to the underskirt of the fairy. Push a sequin onto the legs, right up to the petal skirt and glue in place. Add a hama bead, feeding both legs through, and glue.
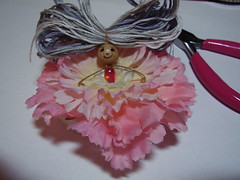 Using the round nose pliers, curl under the bottom of the legs to make the feet. Or, you can add a teardrop bead for feet and bend the wire to secure in place. All that’s left is to style the hair and add props.
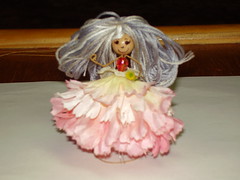 And here she is – the finished fairy!
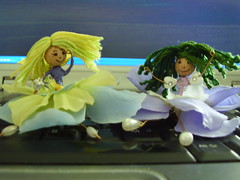 These two fairies have bodies made using embroidery thread. I took a length of thread and tied it to the body. Then, I wound it up the body, around the shoulders and back down. If you prefer, you can wind it along the arms (for sleeves) and then back down the body – as with the yellow fairy.
 I hope that you find the information on the fairy blog helpful. If you do get round to making some fairies, let me know. I would love to see how you get on.
I have set up a section in the sidebar where I will post links to your pictures of fairies. So share them with the world. Flash your flower fairies here!
Have fun!
Toodles.
So many people having babies at the moment every where I look. Here's a nice little idea for a parcel embellishment or small gift:
Take a small silk rose bud and gently open the petals slightly. Pop in a small wooden bead with sleepy eyes drawn on and glue in place.
If the bud has a wire stem, wind it around a skewer to give it some curly twists, add a ribbon bow and stick onto the baby's gift.
Alternatively, cut the stem off, place the bud into a very small terracotta pot (you can leave the pot in its natural state or paint in pastel colours) and glue bud into base of pot. Use this to decorate or embellish a present. Or better still, wrap the whole thing in cellophane with a bright ribbon and give as an additional gift.
I'll see if I can find one in my craft box and will post a picture when I get a chance. I think they look soooo sweet!
I have had a number of enquiries on how to make these beautiful flower fairies. I will be posting instructions on this site in the next 24 hours or so. In the meantime, I can recommend two great books:
1) Petal People You Make Yourself (Klutz) - comes with 'ingredients' to get you started. You can also get mini kits to make flower ballerinas, angels and fairies. For UK enquiries, if you Google KLUTZ you'll find the main online shop for KLUTZ products in the UK.
2) Fairy Crafts by Heidi Boyd (David & Charles) . Full of flower fairies and lots of other fairy goodies.